
Your Cart is Empty


You’re out hiking with friends, or perhaps you’re on holiday in some exotic spot: a ski resort, or an African safari. You turn around to take in the view and Wow! It’s totally breathtaking. A vast mountain sweeping down to the sea or an amazing sunset. But how can you truly capture the scene? Taking great landscape shots can be tricky. So, we’ve gathered some ProTips from professional nature and landscape photo-graphers to help you take mobile shots that will have all your friends saying, “Wow!” too.

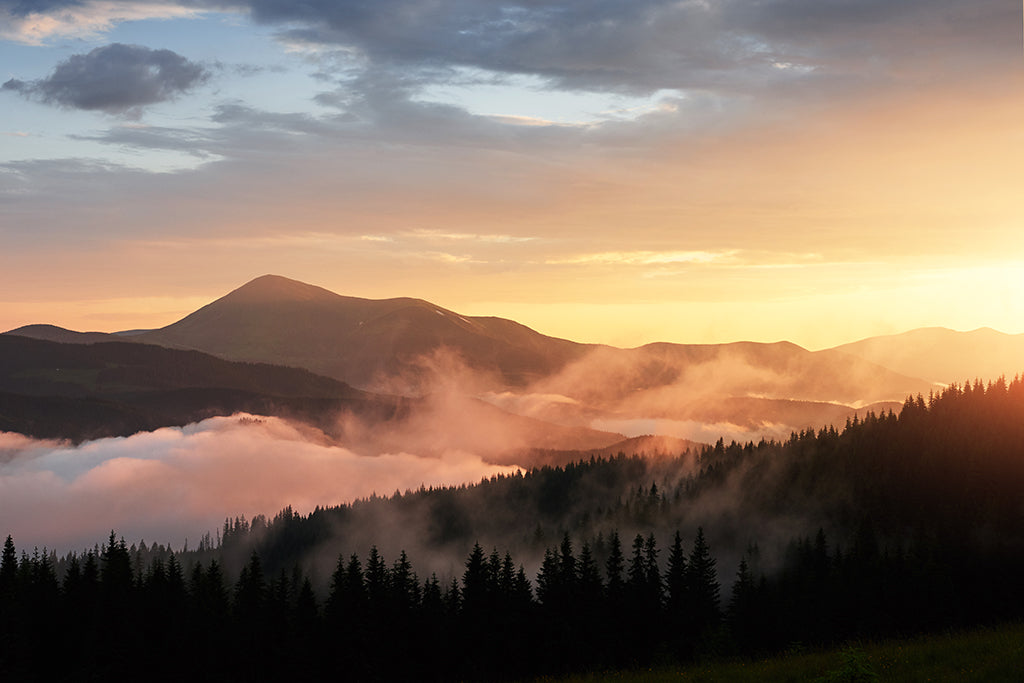
To take great landscape shots, look to the sky. Clouds, sunsets, and the weather can add drama, scale and emotion to your shot. A stormy sky can add mood and depth, while fluffy white clouds can add a bright, cheerful tone. Use the sky to add power to your shots.
It sounds strange, but adding a detail like a tree, an interesting rock, a silhouette of a person or some detail as a focal point in the foreground, can add depth to your shot and make your landscape look grander and more dramatic than just shooting it on its own.

To get a dramatic shot of a vast, wide landscape, you’ll need a vast wide lens. The ShiftCam 12mm Ultra-Wide Angle ProLens allows you to get 300% more into a single frame so you can capture amazing layered landscapes that will suck the viewer right into your shot.

Getting a well-balanced exposure can be difficult in nature photography, especially with a bright sky and shadowy landscape features. The answer is to take High Dynamic Range (HDR) pictures with your iPhone. This means taking, say, three pictures at different exposures for highlights, shadows and mid-range and merging them into one perfectly-exposed image.

To add depth to your landscapes look for elements that lead the eye of the viewer from the foreground to the background. These could be a winding path, a road or a river. Get down low and near to the object, so you create a dramatic, more three-dimensional image.

Another great way to add depth is to frame your main subject in some way. Maybe this could be through a natural feature or an archway or door of some kind. This will give the viewer a better idea of how far away the main feature is.

Lighting is critical for a great landscape photo. So avoid bright, noon-time sunlight. It creates lens flares, strong shadows over-exposed whites, and all kinds of problems. Instead go for shots just after sunrise or just before sunset to give your pictures more drama and more emotion.

Now you’ve got your tips, you need to take the next step and start practising. You may not get the results you want the first time, but you will if you keep trying. Use your ShiftCam 12mm Ultra Wide Angle ProLens, get up early for the sunrise, or embrace the sunset - cocktails optional - look for great skies, merge your HDR pictures for fabulous 3D-like imagery, think of your framing and leading lines, and soon with patience you’ll be impressing everyone with your stunning landscapes. Good shooting.

12mm Ultra Wide Angle ProLens